Toilet Found! is sustained by readers who made purchases through specific links on this site. Learn more
Toilet Placement: The Do’s and Don’ts of Bathroom Design

Beginner’s Guide to Toilet Placement in U.S. Bathroom Design
Designing a bathroom can feel overwhelming, especially if you’re new to toilet installation and bathroom planning. But don’t worry, this guide is here to simplify the process for beginners! Whether you’re renovating a main bathroom or setting up a single-occupant toilet room, understanding the basics of toilet placement will help you create a functional, comfortable, and code-compliant space.
This guide will walk you through the essentials, from rough-in dimensions and plumbing codes to ADA accessibility and space-saving tips. By the end, you’ll have the knowledge to:
Let’s dive into the world of toilet placement and make your bathroom project a success!
Understanding Plumbing Codes & Building Requirements

Every bathroom project starts with adhering to plumbing codes and building requirements. The International Plumbing Code (IPC) and International Residential Code (IRC) set national standards, but local building departments may enforce stricter rules. Here’s what you need to know:
Toilet Rough-In Dimensions
- The rough-in is the distance from the finished wall (including drywall or tile) to the center of the toilet’s drain pipe. Common sizes include:
- Always confirm your rough-in dimensions before purchasing a toilet. For example, a 12-inch toilet rough-in distance means the drain is 12 inches from the wall. Mismatched rough-ins can lead to costly adjustments.
- 10-inch rough-in toilet: Ideal for small spaces or retrofitting older homes.
- 12-inch rough-in toilet: The standard for most modern bathrooms.
- 14-inch rough-in toilet: Less common but used in spacious layouts.
Floor Joist and Structural Support
Toilets are heavy, especially when filled with water. Ensure floor joists beneath the bathroom are reinforced to handle the weight. Boring holes or cutting notches into joists for plumbing can weaken the structure. Consult a contractor if your toilet drain pipe requires rerouting.
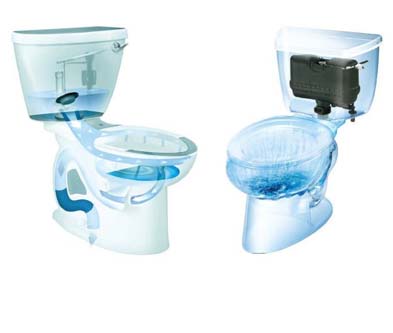
Toilet Flange Placement
The toilet flange connects the toilet to the drain pipe. It must sit level with the finished floor and align perfectly with the drain hole. An offset flange can adjust the position by 1–2 inches if the rough-in is slightly off.
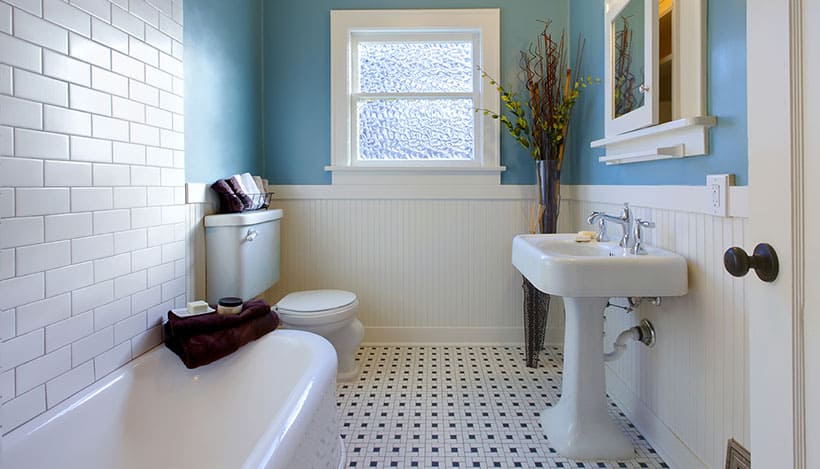
Toilet Placement: Structural & Spatial Guidelines

Floor Space Requirements
The IRC mandates a minimum space of 30×60 inches for single-user toilet rooms. For ADA-compliant bathrooms, a 60-inch diameter turning space is required for wheelchair access. Key clearances include:
Wall Framing and Adjacent Surfaces
Toilets are typically installed against a stud wall for stability. Account for wall thickness when measuring rough-ins, a 1/2-inch wall finish (like tile), reduces the effective rough-in distance. Avoid placing the toilet too close to shower supply lines or bath vanity plumbing to prevent conflicts.
Avoiding Common Layout Pitfalls
ADA Compliance & Accessible Design
The Americans with Disabilities Act (ADA) outlines strict guidelines for accessible toilet compartments:
- Grab Bar Placement:
- Vertical grab bars: 18 inches above the floor, extending to the toilet flange.
- Horizontal grab bars: 33–36 inches high, mounted on the rear wall and side wall.
- Unisex Toilet Rooms:
- These single-occupant toilet rooms must be at least 60×56 inches with outward-swinging doors.
- Compliant Toilet Features:
- Seat height: 17–19 inches from the floor.
- Toilet paper dispensers: Installed 15–48 inches above the floor.
For multi-user toilet rooms, partitions must provide 9 inches of space at water closets for privacy.
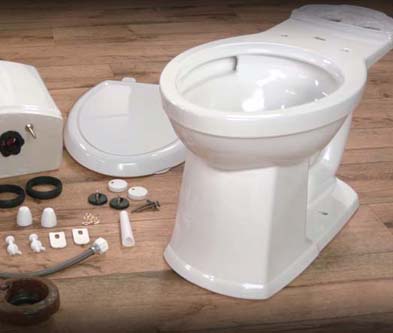
Installation: Plumbing & Rough-In Essentials

Aligning the Toilet Flange and Drain Pipe
The toilet flange must sit flush with the finished floor. If the subfloor is uneven, use a wax ring or foam gasket to create a watertight seal. For concrete floors, epoxy bolts secure the flange.
Rough-In Plumbing Tips
Space-Saving Solutions for Small Bathrooms

Common Mistakes & How to Avoid Them
Toilet placement might seem straightforward, but even small oversights can lead to costly repairs, code violations, or a bathroom that feels cramped and dysfunctional. Let’s dive deeper into the most frequent errors and how to sidestep them:
1. Ignoring Rough-In Dimensions
The Mistake:
Assuming all toilets fit the same rough-in space is a recipe for disaster. For example, installing a 12-inch rough-in toilet in a bathroom with a 10-inch rough-in space leaves a 2-inch gap between the toilet tank and the finished wall, creating an unstable installation and aesthetic eyesore.
Why It Matters:
- Rough-in dimensions dictate where the toilet flange and drain pipe are positioned relative to the wall. Mismatched measurements force homeowners to either:
- Return the toilet and order the correct size (delaying the project).
- Relocate the drain pipe (costing more money in plumbing work).
How to Avoid:
2. Poor Toilet Flange Placement

The Mistake:
Installing the toilet flange too high, too low, or off-center leads to leaks, wobbling toilets, or sewer gas smells. A flange that’s not secured to the subfloor can also loosen over time.
Why It Matters:
How to Avoid:
3. Inadequate Clearance Around the Toilet

The Mistake:
Squeezing the toilet too close to adjacent fixtures like the bath vanity or shower doors violates minimum clearance codes (15 inches from the toilet centerline to walls/fixtures, 21 inches in front).
Why It Matters:
How to Avoid:
4. Overlooking ADA Requirements

The Mistake:
Assuming ADA compliance only applies to public restrooms. In reality, single-occupant toilet rooms in homes (e.g., guest bathrooms) should also meet accessibility standards for aging residents or resale value.
Why It Matters:
How to Avoid:
5. Neglecting Plumbing Access

The Mistake:
Hiding plumbing behind stud walls without an access panel or boxing in the toilet drain pipe with permanent finishes.
Why It Matters:
- Buried pipes make leaks or toilet repairs impossible without tearing out walls.
How to Avoid:
- Install an access panel near the toilet flange or shutoff valves.
- Avoid drilling bored holes through floor joists for plumbing as this weakens structural integrity.
6. Skipping Ventilation Planning
The Mistake:
Placing the toilet in a corner with no airflow can lead to moisture buildup and mold.
Why It Matters:
- Poor ventilation damages wall surfaces and creates unpleasant odors.
How to Avoid:
- Position the toilet near an exhaust fan or window.
- Ensure the fan vents outside (not into the attic).
7. Forgetting Future Maintenance
The Mistake:
Installing a toilet with no extra space around it for cleaning or repairs.
Why It Matters:
- Tight spaces make replacing wax rings or fixing leaks a nightmare.
How to Avoid:
- Leave at least 1–2 inches between the toilet tank and adjacent walls.
- Choose compact toilets or bathroom fixtures with streamlined designs.
Key Takeaways
- Double-check rough-in dimensions: Match your toilet to the 12-inch, 10-inch, or 14-inch rough-in space.
- Prioritize accessibility: Even in homes, ADA-like features improve usability.
- Plan for plumbing access: Don’t seal away pipes without an access panel.
- Consult professionals: A building inspector or plumber can spot issues early.
By sidestepping these pitfalls, you’ll ensure your bathroom is code-compliant, comfortable, and built to last.
Working with Professionals
Toilet placement and installation often require expertise to ensure compliance with building codes and plumbing standards. Always consult licensed plumbers or building inspectors to verify rough-in measurements, toilet flange alignment, and ADA compliance.
Professionals can also address structural concerns like floor joist reinforcement or wall framing adjustments. Their guidance ensures your bathroom is safe, functional, and built to last, saving you time and costly mistakes.
Conclusion
Toilet placement is a blend of art and science. By prioritizing building codes, rough-in dimensions, and accessibility, you’ll create a bathroom that’s both functional and future-proof. When in doubt, consult your local building department or a plumbing inspector to avoid costly rework.
References
- ADA Standards for Accessible Design
- International Plumbing Code (IPC)
- International Residential Code (IRC)
Ready to tackle your bathroom project? Share your questions in the comments or contact a licensed professional to ensure your design meets all building requirements!