Toilet Found! is sustained by readers who made purchases through specific links on this site. Learn more
4 Easy Steps on How to Replace a Toilet Flush Valve

Replacing The Engine That Drives The Toilet
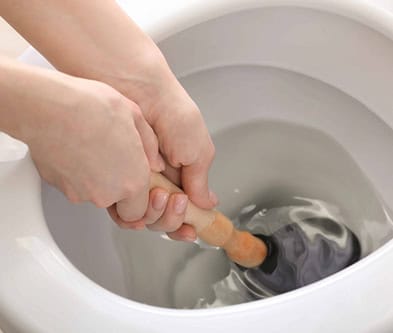
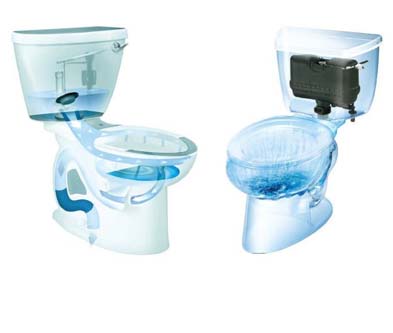
In the toilet tank, the flush valve controls water flowing into the toilet bowl. When you pull the trip lever, it opens to start the flush cycle and closes to stop when you release the handle or flush button. And like all things mechanical, there are wear and tear damages that cause the device to malfunction.
Replacing the flush valve is relatively easy if you don’t mind dirtying your hands a little. The first thing to do is identify the type of flush valve used visually. If you are satisfied with the to-be-replaced valve’s quality and performance, then look for the (toilet’s) brand and model so you can buy back the same valve, hopefully.
Otherwise, you will need to know the diameter of the drain hole at the tank’s bottom to buy the correct size valve. You may refer to the manufacturer’s manual or spec sheet for the valve’s diameter. Or, remove the valve to access the opening for measurement. Once you have the correct size of the drain hole, you can then purchase the appropriate valve for your toilet tank. It is important to ensure that the valve is securely fastened and functioning properly to prevent any leaks or damage to your bathroom. In addition to proper valve installation, it is also a good idea to follow other bathroom safety tips such as installing grab bars and non-slip mats to prevent accidents. These small measures can greatly reduce the risk of falls and injuries in the bathroom.
The most common drain hole size is 2 and 3 inches in diameter – When you remove the flush valve from the tank, you will see a hole at the tank’s bottom. That’s the drain hole. This drain hole size is standard across most toilets, allowing for compatibility with a wide range of replacement flush valves and seals. However, recent toilet trends and innovations have introduced models with alternative designs that optimize water flow and improve flushing efficiency. These advancements not only enhance performance but also align with increasing environmental concerns by supporting water-saving initiatives.
Types of Flush Valves
There are two fundamental types of flush valves commonly used in home toilets – Flapper and Tower or Canister valve. They look and work differently in the opening and closing. Then there is the Dual Flush Valve which offers 2 flushing capacities for solid and liquid waste, respectively. And typically, the dual flush valve is of the tower type.

Flapper Valve
The flapper valve uses a small rubber flap attached to a metal rod or flapper chain that raises the flap to open when the trip handle is pulled. Upon releasing the flush lever, the flap gets pushed down by gravity and closed to stop the water flow from the tank to the bowl.
Tower/Canister Valve
The tower or canister valve operates differently than the flapper valve. Instead of a hinged flap, a rubber gasket attached to the guided cylinder or piston is raised vertically by a metal chain. Like the flapper, the chain is connected to the handle lever.
When the piston is raised, water flows through the 360 degrees vertical opening once the handle lever is pulled. The gasket will drop back to cover the opening and stop the flushing once the lever is released.

Dual Flush Valve
Some toilets have dual flush valves. These valves allow you to choose between normal and partial flushes. The operation is similar to the canister valve. But it has 2 actuation that allows different water volumes to flow through its opening.
Usually, the actuation is via 2 push-buttons instead of a trip lever. Each button controls how much water to let through individually by raising the piston to 2 different height that sets the opening size and timing.
There are also lever operated dual flush valves. So if you have a single flush toilet with a flush handle type operation, you may convert to a dual flush lever system. The complete system will consist of the canister flush valve, which is connected to an actuation coupler by a lever cable, and a bi-direction trip lever.

What Needs to be Replaced?
If your toilet uses a flapper, such as the one in IMAGE-1 below, you may not have to replace the entire flush valve. If the valve body is still in good condition, you only need to replace the flapper.

But not any flapper of the right size will fit the flush valve. Pay attention to how the flapper is coupled to the valve – see IMAGE-1. Most likely, you will have to buy back the same flap from the original manufacturer. Or you can check out Fluid Master or Korky to see if they have a compatible flap.
Likewise, you don’t replace the whole tower valve right away when you detect a running problem or intermittent leaking. 99% of the time, the culprit is a worn-out rubber seal, which probably has lost its elasticity over time. As a result, it cannot provide a proper seal.
So just buy a new seal, and you should be able to solve the leaking problem almost 100% of the time. And sometimes, the manufacturer may just send you a new set of gaskets for free if you are nice and polite over the phone, even after the warranty period (just saying).

What To Do When You Are Unable To Buy Original Parts?
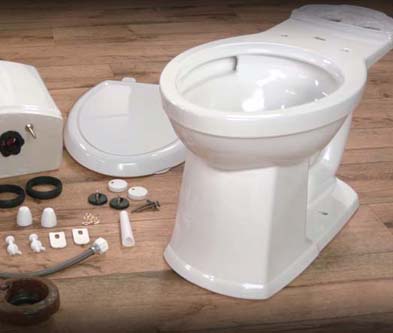
At some point in time, manufacturers will cease to produce dated product models and all respective parts. In which case, you can no longer get original parts for replacement. Of course, if you can still get the flush valve from the dealer’s remaining stockpile, that’s great. But replacing it with a different brand/model or type is a better choice moving forward. And obtaining a different valve type that fits your toilet is possible if you perform the following steps.
STEP 1. The first thing to observe is how everything is laid out and connected. Snap a picture with your smartphone to refer back when you are in doubt. It will help narrow down to the right valve type when corresponding with the vendor.
Tips: Be sure to take pictures at various angles and closeups to eliminate any guesswork as much as possible.
STEP 2. Measure the Height of the old flush valve from the tank’s bottom to the highest part of the valve and take note of the difference between the valve’s and the tank’s height. This is to make sure you don’t end up with a mounted flush valve that is too tall that affects the tank lid from sitting properly, especially for those low profile toilets where the toilet tank is lower than usual.
Tips: Try to get the same height as much as possible. Slight variation (not more than 1/2″) is fine.
And if you have the dual flush buttons mounted on the tank cover, the wrong height will affect the flushing power or cause a running issue. A slight variation in height is acceptable as long as the pushrod is not causing either problem. You can adjust (trim) the adjustment rod to get the best flush actuation.
STEP 3. Check the toilet’s spec sheet or manual for the flush valve diameter. Try Google if you know the brand and model number but don’t have the hard copy. Otherwise, you may need to remove the tank to measure the drain hole size. Or remove the entire flush valve from the toilet tank, exposing the hole on the ceramic if you have a one-piece toilet.
The two most common drain size is 2-inch and 3-inch.
STEP 4. Make sure the fill valve is compatible with the new flush valve. Otherwise, change the fill valve to match.
When you have performed the above 4 steps, you are eliminating the issues of:
- Buying the wrong size valve
- The valve height being too short or too tall
- Compatibility between the fill and flush valves
- Wasted time on installation
Be Confident And Dare to Make Mistakes
It’s only a flush valve that costs no more than $30 at most. But the experience gained at replacing it yourself is priceless. And if you are a little daredevil, try a totally different valve type, like from the canister to the flapper or vice versa.
After all, there are only two holes in the tank that deals with water flow – one for the fill valve and the other for the flush valve. You just need to know the correct diameter and height of the toilet fill valve and flush valve. The mounting part is pretty standard across all types, brands, and models.
Once installed, turn on the water supply and observe the flow of water into the tank and the water level when the flow stops. Check for leaks at the water supply valve and around the toilet bowl top where the tank sits. Ensure the refill tube from the fill valve is inserted in the overflow tube. Then give it a flush to see if the flush cycle (and refill cycle) is normal.
Adjust the lift chain or push-button adjustment rod to ensure everything works like new. Then you are done.
It is impossible to list all the steps for various types of flush valves. But at the same time, there are absolutely no reasons to fear when there are tons of How-to videos you can follow along. In fact, 90% of the time is about getting the right valve size that fits, less so on the types. The rest is a mix of judgment, common sense, and confidence to get the flush valve installed correctly and to work flawlessly.