Toilet Found! is sustained by readers who made purchases through specific links on this site. Learn more
Toilet Rough-in Size: Complete Measuring Guide + Common Sizes
How to Measure Toilet Rough-in – An Important First Step in Buying a Toilet
Getting your toilet rough-in measurement wrong means buying the wrong toilet – a $200+ mistake that’s easily avoided. This single measurement determines which toilets will fit your bathroom. Learn how to measure the first time accurately, understand standard sizes, and find compatible toilets for your space.
Table of Contents
show
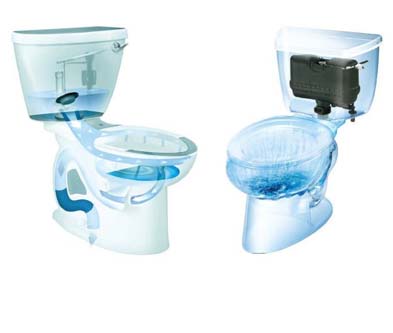
What Is a Toilet Rough-in?
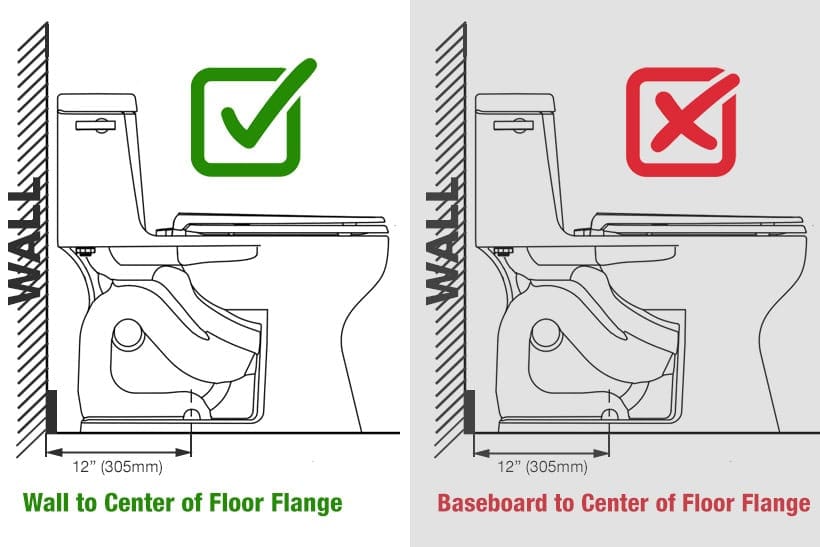
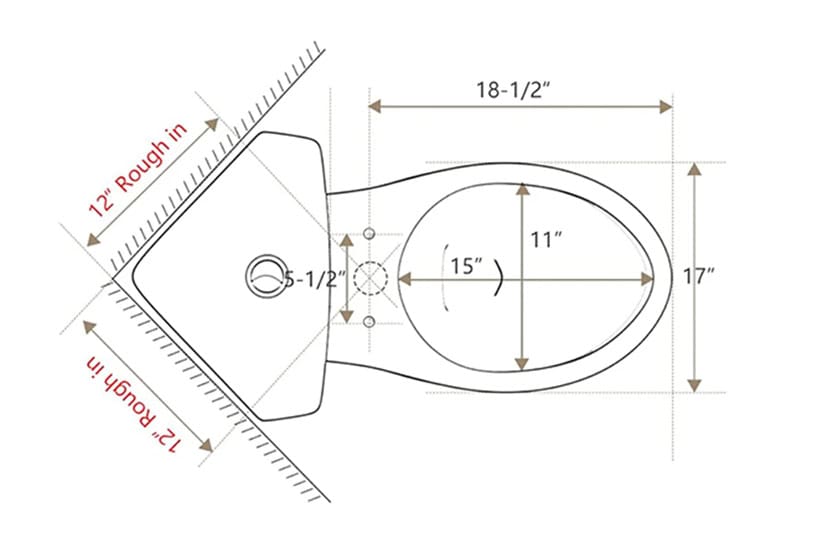
Toilet rough-in refers to the distance from the finished wall behind your toilet to the center of the toilet flange (drain opening) on your bathroom floor. This measurement is part of the critical rough-in dimensions that determine toilet compatibility and proper installation positioning.
The rough-in measurement is set during construction or renovation when plumbers install the drain pipe and toilet flange. Standard rough-in is 12 inches, but older homes and space-constrained bathrooms may have 10-inch or 14-inch rough-ins. These measurements must comply with local plumbing code requirements, typically following the Uniform Plumbing Code standards.
Why Rough-in Measurement Matters
Proper fit: Toilets are manufactured for specific rough-in sizes. Installing a 12-inch toilet bowl on a 10-inch rough-in leaves gaps or prevents proper mounting. Toilet dimensions must match your rough-in dimensions for successful installation.
Installation success: Incorrect rough-in matching can lead to installation failures during the process, resulting in wasted time and requiring return trips to the store.
Structural integrity: Installing the wrong-sized toilets can damage flooring, create leaks, and void warranties.
Cost implications: Returning and exchanging toilets can be time-consuming and often involve restocking fees.
New Construction vs Replacement Scenarios
New construction allows you to choose any rough-in size during the planning stage. Builders typically use a 12-inch standard for maximum toilet selection.
Replacement installations require matching the existing rough-in measurement. Changing rough-in size requires expensive plumbing modifications.
Renovation projects offer opportunities to adjust rough-in size if you’re already modifying the bathroom layout and plumbing.
How to Measure Toilet Rough-In
Accurate measurement takes 5 minutes and prevents expensive mistakes. Use these step-by-step methods for precise results.
Tools You Need
Essential tools:
- 25-foot tape measure (metal, not fabric)
- Flashlight or headlamp
- Pencil for marking
Optional tools:
- Level to verify flange positioning
- Digital camera for reference photos
- Notebook for recording measurements
Step-by-Step Measurement Process
Follow these steps for accurate rough-in measurement:
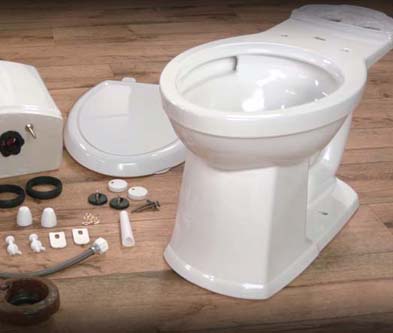
Step 1: Remove decorative caps covering the toilet bolts if you are measuring with the toilet installed. For removed toilets, clean the flange area thoroughly to ensure the markings are clearly visible.
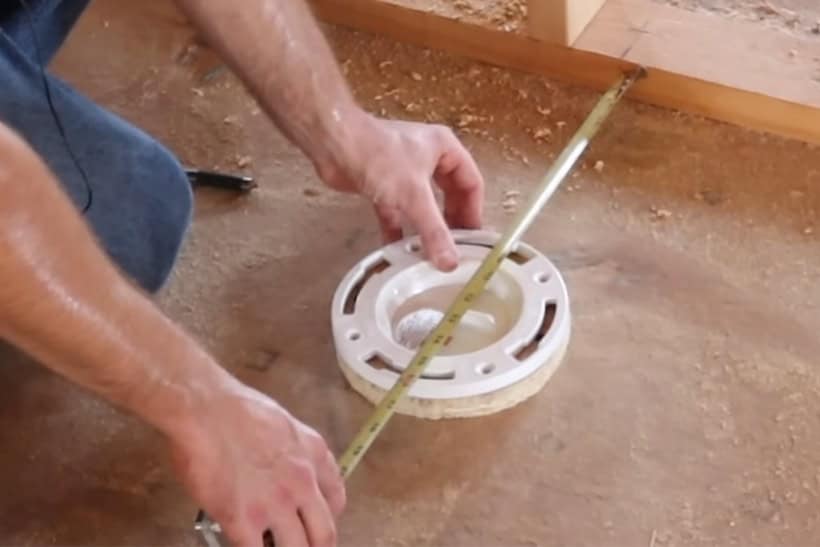
Step 2: Locate the Toilet Flange. The toilet flange is the round fitting secured to your bathroom floor where the discharge/drain hole connects. With the toilet removed, you’ll see it directly, but when the toilet is installed, locate the flange bolts (mounting bolts) that attach the toilet bowl through the flange slots.
Step 3: Identify the Measuring Wall Measure to the finished wall surface behind the toilet, not the baseboard. The finished wall is the drywall, tile, or other surface material – not the framing behind it.
Step 4: Measure Center to Wall. Place your tape measure at the exact center of the closet flange. Extend the tape perpendicular to the wall behind the toilet. Read the measurement where the tape meets the finished wall surface.
Step 5: Account for Wall Thickness. If your wall has thick tile or multiple layers, measure to the true finished surface. Baseboards don’t count – measure to the wall above or behind them.
Step 6: Verify Measurement Accuracy. Take a second measurement from a slightly different angle. Both measurements should match within 1/8 inch. If they differ significantly, remeasure carefully.
Common Measurement Mistakes
Measuring With Toilet Installed

When you don’t want to remove your existing toilet, use the bolt measurement method for rough-in estimation.
Bolt Measurement Method
Time required: 3 minutes
Accuracy: Within 0.5 inches
Best for: Quick estimates before toilet shopping
Process:
When This Method Works
The bolt measurement method provides sufficient accuracy for:
Accuracy factors:
When This Method Fails
Don’t rely on bolt measurement for:
For these situations, remove the toilet and measure directly to the flange center for guaranteed accuracy.
Measuring After Toilet Removal
Direct flange measurement provides the most accurate determination of rough-in.
Direct Flange Measurement
Time required: 2 minutes
Accuracy: Exact measurement
Best for: Guaranteed accuracy before purchasing
Process:
Advantages of Direct Measurement
Checking Flange Condition
While measuring with the toilet removed, inspect your flange:
Flange height: Should sit flush with or slightly above finished floor. Sunken flanges need extender rings.
Damage or cracks: Cracked toilet flanges require replacement before installing a new toilet.
Flange bolt slot condition: Worn or broken slots prevent secure toilet mounting.
Corrosion: Heavy rust or deterioration indicates that replacement is needed.
Standard Rough-in Sizes
Understanding standard rough-in sizes helps you identify your measurement and find compatible toilets.
12-Inch Rough-in (Most Common)
The 12-inch rough-in represents 80% of residential toilet installations and virtually all new construction.
Prevalence: Standard in homes built after 1950, all new construction, and most remodels.
Toilet selection: Widest variety available. Nearly every toilet manufacturer offers 12-inch rough-in models across all price ranges.
Style options: One-piece, two-piece, wall-hung, comfort height, and specialty toilets are all available for a 12-inch rough-in.
Price advantage: Competitive pricing due to high production volumes and wide availability.
Installation: Straightforward installation with standard parts and wax rings.
10-Inch Rough-in
Common in: Homes built before 1950, small powder rooms, bathrooms with unusual layouts, and some mobile homes.
Toilet selection: Limited but sufficient. Major manufacturers produce 10-inch models, though choices are restricted compared to 12-inch options.
Price consideration: Expect 15-25% price premium over comparable 12-inch models due to lower production volumes.
Feature limitations: Fewer luxury options, limited smart toilet availability, restricted one-piece toilet selection.
Installation notes: Requires specifically designed 10-inch rough-in toilets. Standard 12-inch toilets won’t fit properly.
14-Inch Rough-in
The 14-inch rough-in is less common, appearing in specific renovation scenarios and older buildings.
Occurrence: Older homes with modified plumbing, some commercial buildings, and custom installations with space constraints.
Toilet availability: Specialty models from select manufacturers. Requires special ordering in most cases.
Selection challenges: Very limited style and feature options. Few manufacturers produce 14-inch models regularly.
Custom order requirements: Expect longer lead times (2-4 weeks) and potential restocking fees if returns are needed.
Alternative solutions: Consider offset flanges or plumbing modifications for better toilet selection.
Non-Standard Sizes
Rough-in measurements outside 10, 12, or 14 inches require custom solutions.
When they occur:
Solution options:
Cost implications:
Toilet Options by Rough-In Size
Understanding which toilets fit your rough-in size guides purchasing decisions and manages expectations.
12-Inch Rough-In Toilet Options
Budget range ($150-300):
Mid-range ($300-600):
Premium range ($600-2,000+):
Style variety: One-piece and two-piece designs, comfort height options, elongated and round bowls, dual-flush models, pressure-assist systems, wall-hung toilets, and smart toilets with bidet functions. Note that rear-outlet toilets have different rough-in requirements and mount to the wall rather than the floor.
10-Inch Rough-In Toilet Options
Limited selection requires early planning and verification of availability.
Available models:
Feature limitations:
Ordering considerations:
Price premium: Expect 15-25% higher prices compared to equivalent 12-inch models due to lower production volumes.
14-Inch Rough-In Toilet Options
An extremely limited selection requires flexibility and patience.
Available manufacturers:
Selection reality:
Ordering process:
Alternative consideration: Many homeowners with 14-inch rough-ins choose offset flanges to access a wider 12-inch toilet selection rather than limiting choices to 14-inch specialty models.
What If Your Rough-in Is Wrong?

Discovering non-standard rough-in measurements doesn’t mean impossible situations. Several solutions adjust positioning or expand toilet options.
Offset Flanges
Offset flanges reposition the toilet drain connection by up to 2 inches.
How they work: The offset flange rotates the drain opening to shift the toilet position forward or backward. This allows using standard toilets with slightly off-spec rough-ins.
Adjustment range:
Cost and installation:
Limitations:
Best applications:
Wall Repositioning
Major rough-in discrepancies sometimes require moving the wall position.
When necessary:
Process overview:
Cost implications:
Planning considerations: Only economical during major bathroom renovations. Not cost-effective for simple toilet replacement projects.
Custom Toilet Selection
Sometimes selecting toilets designed for your exact rough-in proves simpler than modifying plumbing.
When this works:
Selection process:
Realistic expectations: Limited choices mean compromising on features, styles, or colors compared to the standard 12-inch selection.
Professional Consultation
Complex rough-in situations benefit from a professional plumber’s assessment.
Consult professionals when:
Consultation value:
Typical consultation cost: $75-150 for assessment and recommendations. Often waived if you hire the plumber for installation work.
Flange Height Requirements
Proper flange height ensures leak-free operation and correct toilet positioning.
Ideal flange height: Flush with finished floor surface or up to 1/4 inch above.
Too low (sunken flange):
Too high (raised flange):
Correction methods:
Floor Material Thickness

Different flooring materials impact rough-in measurements and installation, as measurements always begin from finished surfaces, not underlying subfloors.
Horizontal measurement considerations: Plumbers must account for future wall thickness when roughing in drains. A standard 12 inch rough-in needs the flange center at 13 inches from bare studs when wall materials total 1 inch. Measuring 12 inches from studs creates an 11 inch finished rough-in, which is too short for most toilets and causes gaps or fit issues.
Vertical flange height: Tile thickness raises the finished floor. The flange must sit level with or slightly above the finished floor for a proper seal. Setting the flange before tile lowers it once tile and mortar are added. Low flanges cause leaks. Fixes include extension kits or thick wax rings.
Vinyl or linoleum: Minimal thickness change. Standard measurements usually work since these materials add about 1/8 inch.
Hardwood: Three-quarter-inch thickness may require flange height checks. Confirm the flange ends up level with the finished floor.
Multiple floor layers: Layered flooring increases total thickness. Each layer affects the rough-in distance and flange height. Calculate total thickness before roughing in plumbing to avoid corrections later.
Professional vs DIY Installation
Deciding between professional and DIY installation depends on several factors.
DIY is appropriate when:
- Standard 12-inch rough-in
- The flange is in good condition at the proper height
- Experience with basic plumbing
- Standard toilet design (not wall-hung or complex)
- Backup bathroom available during work
Professional recommended for:
- Non-standard rough-in sizes (10-inch or 14-inch)
- Flange damage or improper height
- Wall-hung or complex toilet systems
- First-time installations
- Expensive toilet purchases
- No backup bathroom available
Professional installation costs:
- Basic toilet installation: $150-300
- Complex installations: $300-500
- Includes disposal of old toilet, wax ring, supply line, and warranty on installation work
Frequently Asked Questions
What if I measure between standard sizes?
Measurements between 11-13 inches typically work with 12-inch rough-in toilets. Below 11 inches, use offset flanges or 10-inch toilets. Above 13 inches, consider 14-inch models or offset flanges.
Are offset flanges reliable long term?
Quality offset flanges installed correctly provide reliable, leak-free operation. Local building codes sometimes restrict their use, so verify before purchasing.
Do wall-hung toilets have rough-in requirements?
Wall-hung toilets require carrier systems mounted to wall framing. Rough-in is measured differently – from finished wall to carrier mounting position. Specify wall-hung requirements when ordering.
What about corner toilet installations?
Corner toilets require measuring to both walls. Verify rough-in to the primary wall behind the toilet matches the manufacturer’s specifications. Corner models accommodate tight spaces but offer limited selection.
Can I adjust the rough-in by installing the toilet at an angle?
Never install toilets at angles to compensate for an incorrect rough-in. Angled installation causes leaks, prevents proper sealing, and creates mounting problems. Always match the toilet rough-in to the flange position.
How do I handle old lead flanges?
Lead flanges in older homes sometimes have non-standard sizing. Measure carefully to the actual center point. Consider replacing lead flanges with modern PVC flanges during toilet replacement for better reliability.
Measure Right, Install Once
Accurate rough-in measurement takes 5 minutes and prevents costly mistakes. Standard 12-inch rough-in offers maximum toilet selection and straightforward installation. Non-standard sizes require specialty toilets or offset flanges but remain manageable with proper planning.
Measure directly to the flange center when possible for guaranteed accuracy. Bolt measurement methods work for quick estimates but lack precision for final purchasing decisions. Account for wall materials, floor thickness, and flange condition during measurement.
Verify your measurement twice before purchasing expensive toilets. Take photos of your installation area and bring measurements to the store when selecting toilets. Consult professional plumbers when measurements fall outside standard sizes or when complex installations are involved.
The right rough-in measurement ensures proper fit, leak-free operation, and successful installation on the first attempt.